Car ownership brings with it the responsibility of regular maintenance—tasks that are vital for the longevity and reliability of your vehicle, yet often overlooked. One of the most significant maintenance jobs is performing a coolant flush. Over time, coolant degrades, picking up rust and debris, which can hinder your engine’s ability to stay cool. A proper coolant flush removes old fluid and contaminants, replenishing the system with fresh coolant to prevent overheating and corrosion.
In this step-by-step guide, you’ll learn how to perform a coolant flush like a pro: understand what tools you need, follow clear instructions, know safety precautions, and get insider tips for a flawless result. Empowering yourself with this knowledge not only saves you money but also ensures your engine runs smoothly, even when the road heats up.
1. Why a Coolant Flush Matters
Underneath the hood, engine coolant plays a quiet yet crucial role—regulating temperature, preventing corrosion, and protecting vital engine components. Over time, its protective additives degrade, pH levels can fall, and scale or rust can accumulate. A coolant flush isn’t just a “nice-to-do”; it’s an essential maintenance task that ensures your cooling system remains free-flowing and effective. Ignoring coolant replacements can lead to overheating, warped cylinder heads, blown head gaskets, and even total engine failure—a disaster both in terms of safety and expense.
2. When Should You Do a Coolant Flush?
Just like an oil change follows mileage recommendations, coolant needs attention at the right intervals. But when is the optimum time to flush it? Timing can be based on mileage, age, or observable symptoms. Understanding the sweet spot for flushing helps you dodge premature breakdowns and ensures reliable performance. This section will help you identify the correct interval for your vehicle and recognize warning signs that demand immediate action.
Signs you need a coolant flush:
- Manufacturer’s recommendation: typically every 2–5 years or 30,000–60,000 miles.
- Discolored or rusty-looking coolant.
- Presence of debris or sludge in the system.
- The engine is running hotter than normal or occasionally overheating.
- Sweet smell inside the cabin or evidence of leaks.
3. What Tools and Materials Do You Need?

Doing a coolant flush like a pro means having everything ready before you begin. Gathering tools and materials ahead of time ensures a smooth, efficient process—and saves you from mid-job trips to the auto parts store. You’ll need items that help drain and refill the system, measure fluid ratios accurately, and do the job cleanly and safely. Here’s what a well-prepared car owner keeps in their garage for this task.
Tools and materials checklist:
- Container or drain pan (at least 2–3 gallons capacity)
- Wrench or socket set for the drain plug and hose clamps
- Funnel with flexible neck
- Garden hose (if doing a full system flush with water rinse)
- New coolant (50/50 pre-mix or concentrated with distilled water)
- Distilled water (if using concentrate)
- Radiator flush chemical (optional, for stubborn buildup)
- Gloves, eye protection, and rags/newspaper for spills
- Jack and jack stands (if needed for access)
- Thermometer or infrared temp gun (helpful for confirming temperature)
4. How to Do a Coolant Flush Like a Pro
Now let’s get into the meat of the “car maintenance hacks: how to do a coolant flush like a pro.” This section walks you through each step—from preparation to clean-up—delivering the precision and confidence that come with a professional job. Stick with it, follow safety practices, and your cooling system will be refreshed and performance-protected.
Step‑by‑Step Guide:
- Let the engine cool thoroughly
Never start on a hot engine. Allow it to cool for at least two hours to avoid burn risks. - Set up safely
Park on level ground, apply the parking brake, and wear gloves and eye protection. Use jack stands if the clearance is low. - Locate and remove the radiator cap
This relieves pressure and allows better drainage. - Drain the old coolant
Place the pan under the radiator drain plug—typically located at the bottom. Loosen the plug and let the fluid completely drain. Also, open the engine block drain (if available) to remove trapped pockets of old coolant. - Flush with water (optional but recommended)
With the plug still out, carefully insert a garden hose into the radiator neck and run water through until it flows clear, indicating sediment removal. - (Optional) Use a radiator flush chemical
If buildup is an issue, follow the instructions on the flush product: usually run the engine briefly, then drain as above. - Close drains and reattach hoses
Make sure all plugs are snug and hose clamps are secure, avoiding overtightening. - Refill with proper coolant mix
Use pre-mix or add distilled water to concentrate. Fill slowly until the radiator is full, then fill the expansion tank to the correct level. - Eliminate air pockets (bleed the system)
Run the engine with the radiator cap off—on low heat—until you see bubbles release. Gently squeeze the upper radiator hoses. When bubbling stops and the temperature stabilizes, replace the cap. - Test drive and recheck
Drive until operating temperature, then recheck coolant levels and cap tightness. Top off if necessary.
5. Safety First: Precautions and Pitfalls to Avoid
A coolant flush, while straightforward, carries real risks if not handled properly. Hot coolant is dangerous; spills can damage paint or harm surfaces. Incorrect coolant mixtures or trapped air pockets can result in overheating or corrosion. To truly flush like a pro, awareness of these hazards and preventative measures is essential. Here’s how to keep safety front and center.
Key precautions and what to avoid:
- Never open a hot radiator cap. Always wait until fully cooled.
- Dispose of old coolant responsibly. Don’t pour it down drains or onto the ground—it’s toxic to pets, wildlife, and plants. Many auto shops recycle it.
- Avoid overtightening drain plugs. You can strip threads or crack the radiator.
- Bleed correctly. Air pockets can lead to hot spots and page‑warming engine temperature swings.
- Use the appropriate coolant. Mixing incompatible types (e.g., inorganic additive coolant with organic acid technology) can damage seals and reduce protection.
6. Questions Car Owners Ask: FAQs
Even experienced vehicle owners can pause at certain points during a coolant flush. Here are some commonly asked questions—answered clearly—so you can proceed with confidence.
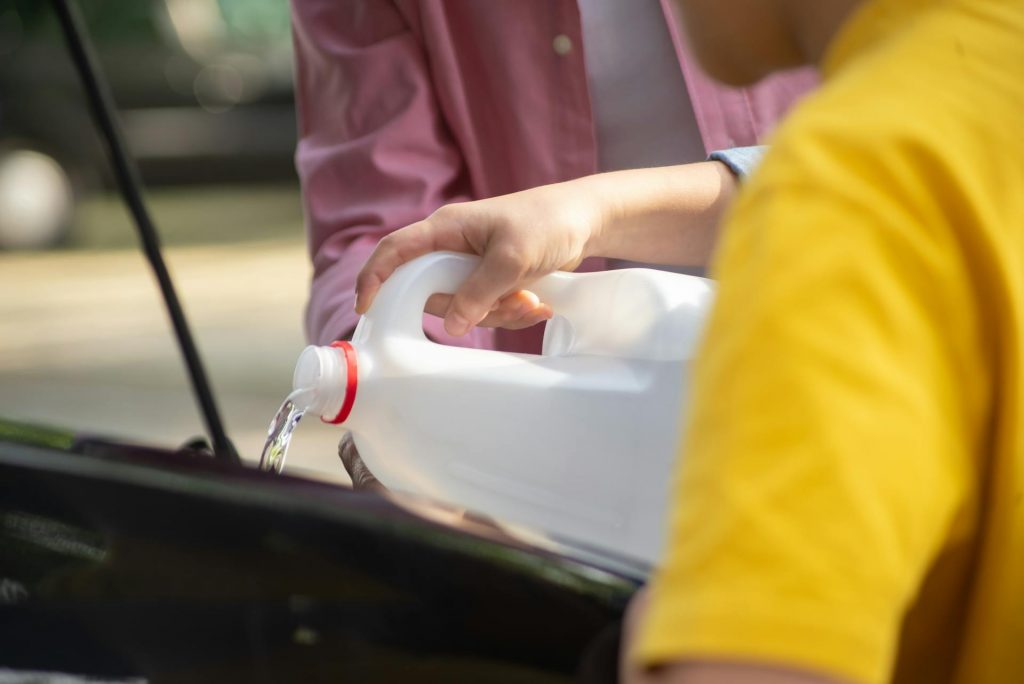
Q1: Can I use tap water instead of distilled water for mixing coolant?
Tap water contains minerals that, over time, cause scale buildup and rust. Always use distilled water for best protection and cooling efficiency.
Q2: Do I need to flush when switching coolant brands?
Yes. Flushing ensures no residue remains that might react with the new coolant’s chemistry or reduce effectiveness.
Q3: What if my overflow tank remains full after the flush?
That may be a sign of trapped air in the system. Run the engine—heater on—until the thermostat opens, and watch for air bubbles.
Q4: How do I know if I have a “no-drain-plug” radiator?
Some modern radiators lack a plug. In this case, remove the lower hose to drain the system. Make sure to catch fluid safely.
Q5: Is a coolant flush messy?
It can be, but you can minimize mess by placing absorbent pads or newspaper underneath, wearing gloves, and cleaning spills immediately.
7. Pro Tips to Make the Job Easier and Cleaner
Even when you know the steps, small refinements transform a routine coolant flush into a pro-quality job. Here are tactics that seasoned mechanics—and precise DIYers—use to make the process cleaner, faster, and more effective.
- Use a split drain-pan or sheet of plastic underneath to catch drips.
- Keep a battery-operated camp light or work lamp underneath to spot drips or leaks.
- Preheat the car (just enough to open the thermostat) with the radiator cap off—this helps more old coolant drain out.
- Label hoses/clamps with masking tape before removal to simplify reassembly.
- Keep extra hose clamps or drain plug washers on hand, in case the originals are corroded.
- Pour coolant using a measuring jug or graduated funnel to get the mix exactly right.
- Record the date and mileage of the flush—write it right on the coolant reservoir cap with a china marker for the next reference.
8. After the Flush: What to Monitor
Once your coolant flush is done and the engine has cooled again, don’t just walk away. Monitoring certain indicators in the next days and drives ensures the system settled correctly, and gives a professional finish to your work.
Post-flush monitoring checklist:
- Coolant level: Check again after your first drive and re-tighten the cap as needed.
- Operating temperature: Keep an eye on your gauge—ensure it stays steady in the normal range.
- Leaks: Inspect hoses, drain plug, and radiator for drips or residue.
- Fluid clarity: When you get home next time, the engine is cold, inspect the reservoir—the coolant should remain clean and clear.
- Temperature swings or bubbling: If they occur, there may still be trapped air—bleed again.
9. Myth‑Busting: Common Misconceptions About Coolant Flushes
Many myths cloud DIY car maintenance, and coolant flushes are no exception. Dispelling these misconceptions helps you make informed, safe decisions and avoid unnecessary costs—or worse, avoidable damage.
Myths vs. Facts:
- Myth: “Flushing more often than mileage specs is always better.”
Fact: Over-flushing can wash away critical anti-corrosion coatings. Stick with manufacturer intervals. - Myth: “Any coolant will do.”
Fact: Using generic or incorrect coolant types can reduce protection and void warranties. Always use the type specified in your owner’s manual. - Myth: “Just top off instead of flush.”
Fact: Topping off mixes fresh with degraded coolant, diluting effectiveness. Complete flushes refresh the system fully.
10. Final Takeaways
Performing a coolant flush doesn’t require specialized equipment—just the right preparation, attention to detail, and safety awareness. As a resourceful car owner, doing a professional-level coolant flush saves money and gives peace of mind that your engine cooling system is up to task.
By knowing when to flush, gathering the right tools, following each step carefully, and monitoring results afterward, you’re investing in your car’s resilience. Treat it like a pro, and your engine will reward you with years of cool, dependable service.